.svg)


.svg)
.svg)
Connect Embrava DMS to Envoy
The purpose of this section is to describe how to connect the Embrava DMS to your Envoy instance.
Use the following steps to connect the Embrava DMS to your Envoy instance using the Signup wizard:
1.
Get started with Embrava
Login to the Embrava Device Management Portal at https://portal.embrava.com
2.
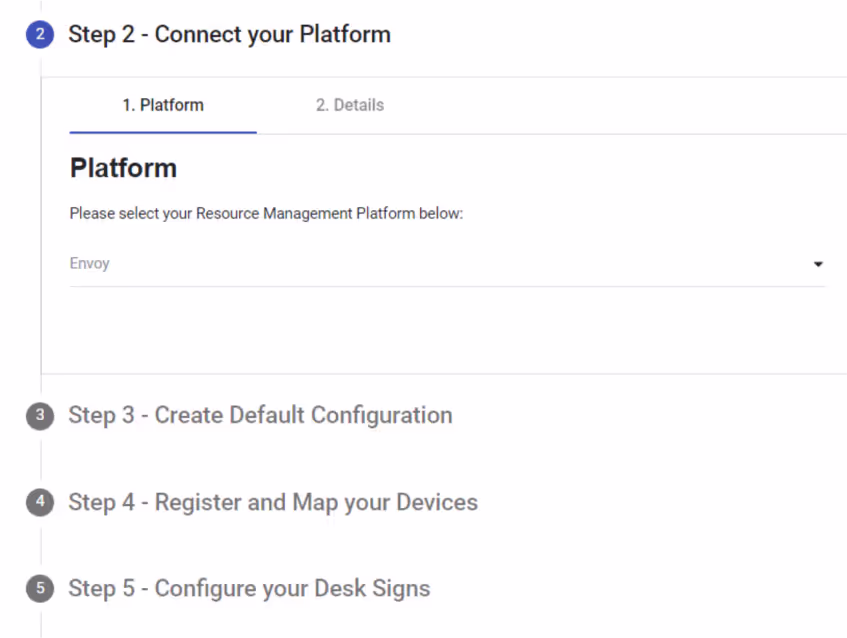
Connect your Platform
Follow the Wizard until you get to Step 2 – Connect your Platform. Select Envoy as your Platform and click Next as shown below:
3.
Envoy Account Authentication
Click Sign in and an Envoy Log In dialog will be displayed as shown. Log In using your Envoy account.


Once you've successfully signed in, your DMS will be connected to your Envoy instance. Click Complete Step 2 to finish this step.
You are now ready to create a default Desk Sign configuration.
4.
Desk Sign Configuration
Once you have successfully connected your Embrava DMS to your Envoy instance, you must create a default Desk Sign configuration so that when your Desk Signs are first powered and connected to a network they will pull down and use this configuration from the Embrava DMS.
Create a default Desk Sign configuration by completing Step 3 of the setup wizard as shown below:
.svg)
- Enabled Components – Enable network and card reader components.
- Network: Choose the network type the Desk Sign should use to connect to the Embrava DMS.
- Card Reader: Enable the 125KHz or 13.56MHz card reader based on the security badge you will use.
- Mask: We need to determine the mask value to correctly decode your badges. Please follow the instructions below:
- Once you have completed the remaining steps of this guide, power and network your Desk Sign so that it boots up to the Available green state.
- Once your Desk Sign has booted up, present your badge on the Tap Card icon on the device. You should hear your Desk Sign beep when it detects your card.
- Once the Desk Sign detects your card, open up the Dashboard section in the Embrava DMS portal and you will see the decoded badge number.
- Provide the decoded badge number from the Dashboard along with the expected badge number of your card to the Embrava Support team and we will provide you a mask to correctly decode your cards.
- If you have any issues with these steps, please contact Embrava Support and we'll gladly assist you.
- Wi-Fi Details – Specify credentials if connecting the Desk Sign to a Wi-Fi network.
- Alert Settings – Different settings that control the state of the Desk Sign.
- Alert Mode: Specifying if the device will display workspace or user availability.
- Booking Duration: The default booking duration that is used when a user taps their security badge to create a booking on the Desk Sign. A value of ‘0’ creates a reservation for the full day.
- Ending Alert Time: The amount of time remaining in a reservation where the Desk Sign will change to the Ending state to alert the user that their reservation is about to end.
- Enable Clean State: Display the Requires Cleaning state when a checked-in reservation has ended.
- Display Settings – Used to control what is displayed on the Desk Sign screen.
- Name Display: Toggle between displaying the name of the event/reservation and the owner of the reservation.
- Anonymize Name: Prevent the name of the reservation from being displayed on screen to keep the reservation private.
- Time Settings – Specify the time format and time servers the Desk Sign should use to synchronize and display time.
- Workspace Status Settings – Define which colors the Desk Sign should use to depict the workspace status: Available, Reserved, Checked-In or Ending.
Once you have created your default Desk Sign configuration you are ready to map the Desk Signs to a Seat in Envoy.
5.
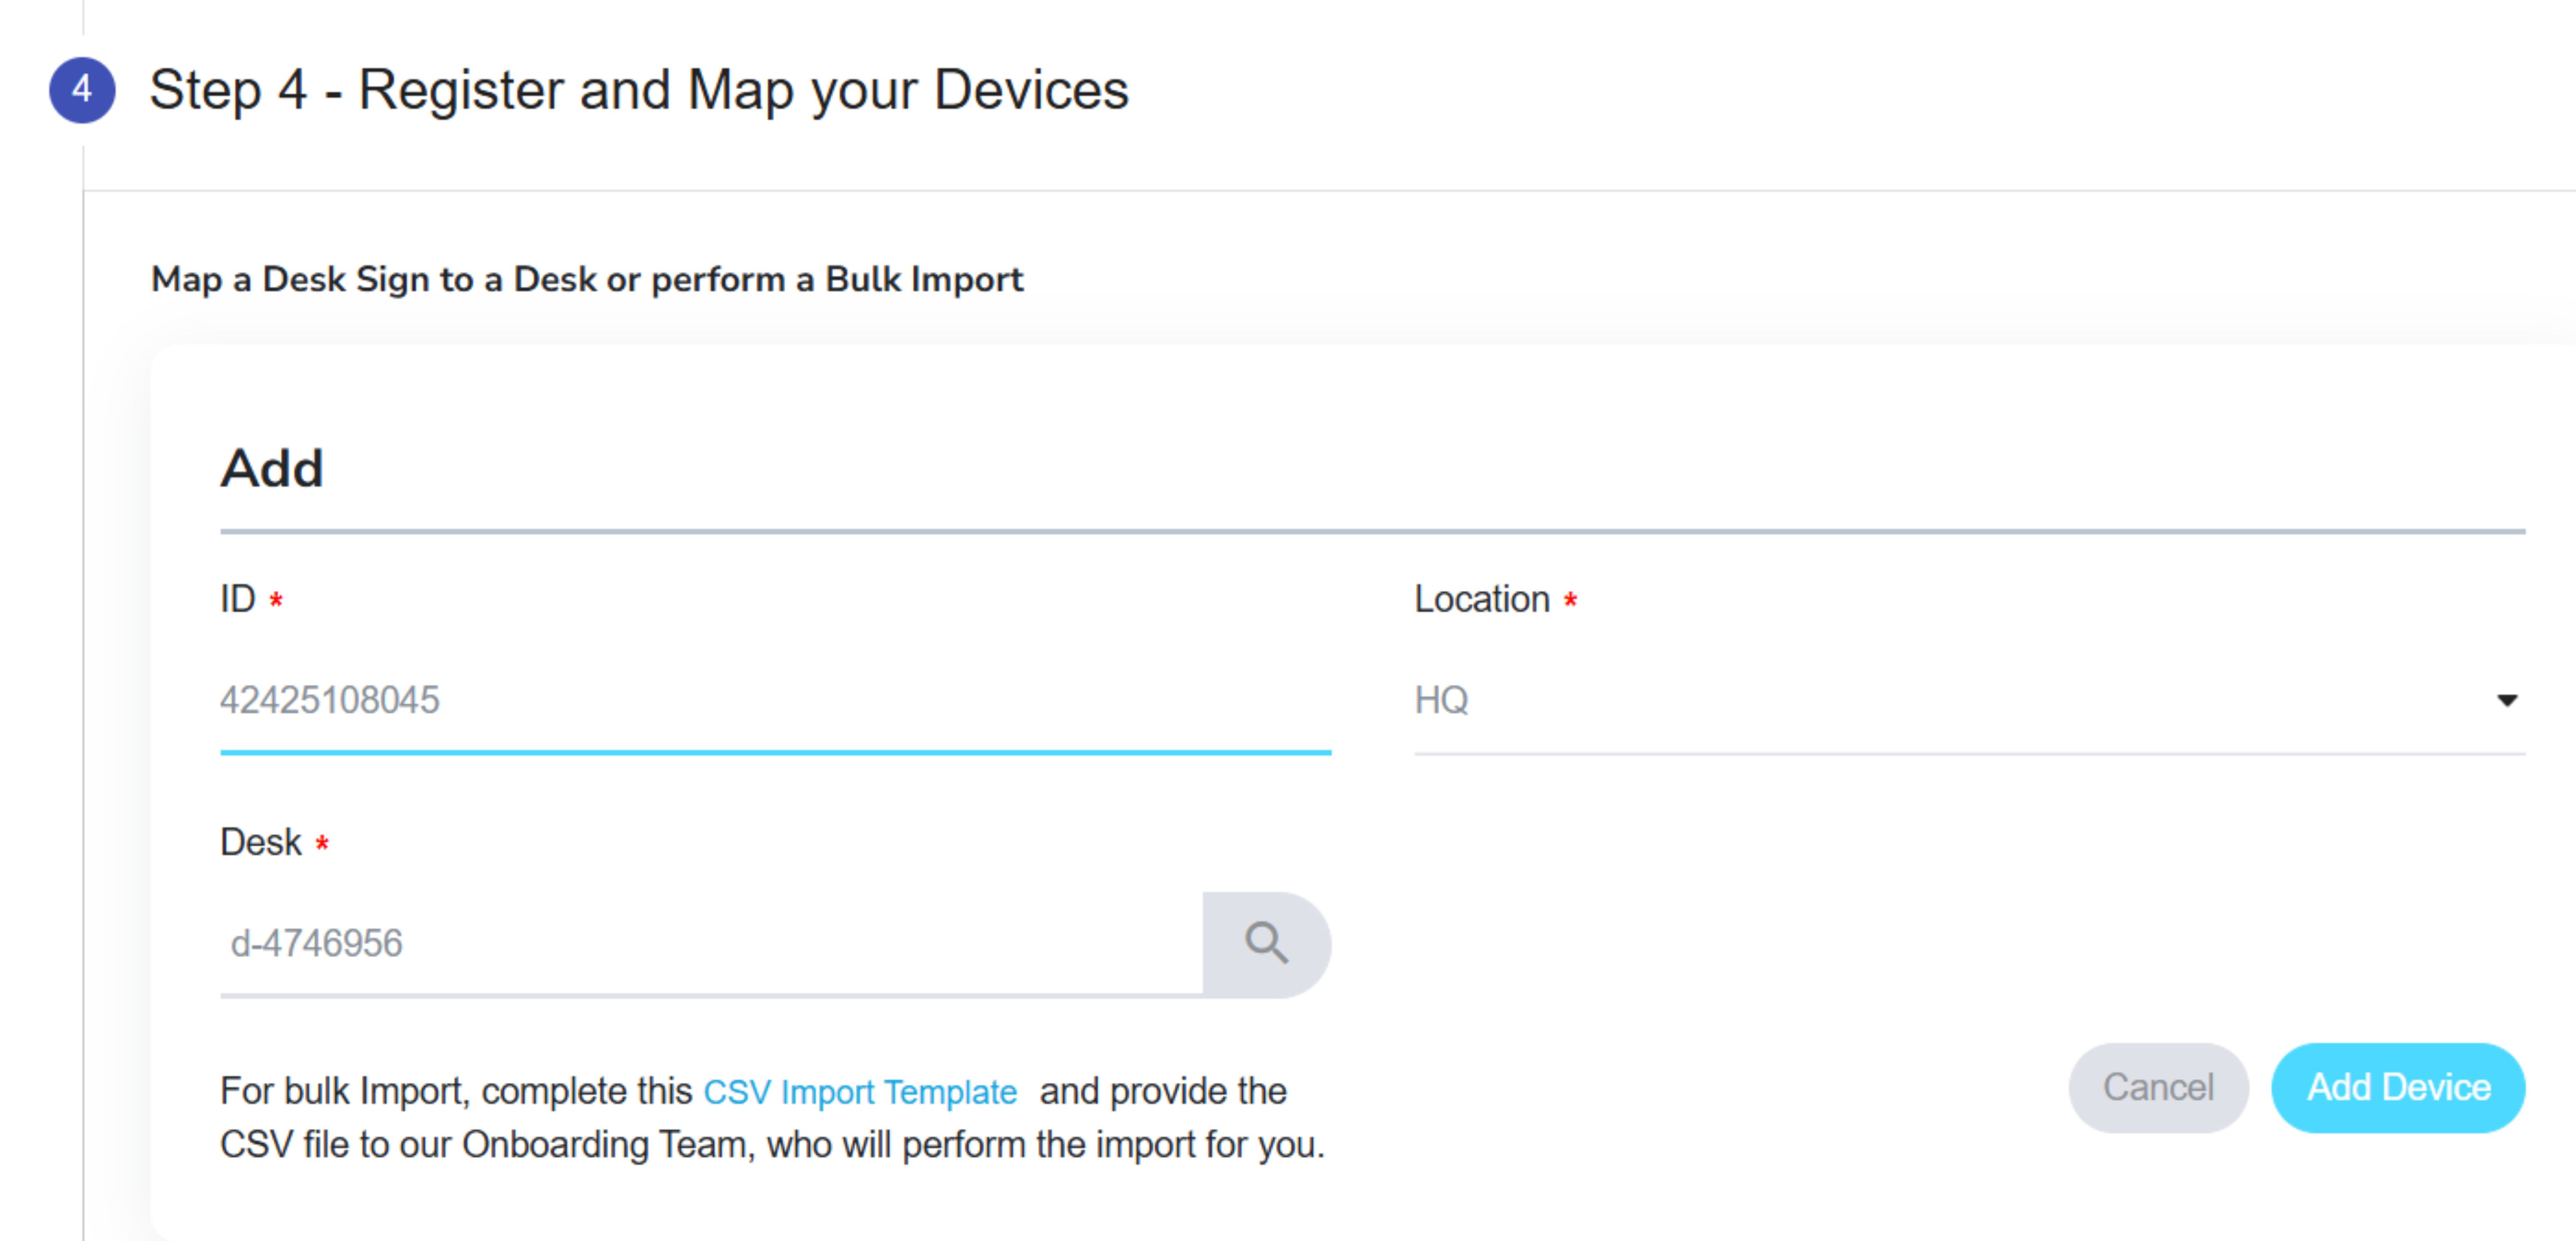
Add/Import Devices
Desk signs can be added by entering Embrava ID, Location and Desk. Embrava ID is the Serial no printed on the back of the desk sign device. Location and Desk will be prepopulated after the successful Envoy Account Authentication step previously completed. For bulk Import, complete the CSV Import template and provide the CSV file to our Onboarding Team, who will perform the import for you.
Upon adding the devices click on Complete Step 4 button.
Note: Devices can also be added on a later period from the dashboard.
6.
Network Configuration
Under the Prepare Network and Configure Desk Signs tab, you can read about generic information about the network details required for Embrava desk sign and boot up process. Now you can click on Complete Step 5.
.svg)
7.
Installation Guide
Step 6 will take you through the Installation guide and with that you are all set. Click on the Complete Step-6 button and you will be taken to the dashboard.
8.
User-badge mapping
After completing the sign-up wizard, to map the users with the badges, open the Users tab from and select the ‘Add User’ button. Enter the External ID (email address), Employee ID and the Badge Number and save.
