.svg)


.svg)
.svg)
1. Prepare Appspace
The purpose of this section is to detail the steps required to prepare Appspace to allow the Embrava DMS to connect and display resource availability from Appspace on the Embrava Desk Sign.
Two steps are required to prepare Appspace for a connection with the Embrava DMS:
1.
Gather Platform Service URL: This is the endpoint that the Embrava DMS will use to synchronize bookings with Appspace.
2.
Create API Token: This is used by the Embrava DMS to create authenticated requests to the Appspace API.
These steps are detailed further below:
Gather Platform Service URL
For the Embrava DMS to make calls to your Appspace instance, the Embrava DMS requires that your enter an Appspace API Endpoint (Platform Service URL).
Follow the steps below to gather your Platform Service URL:
1.
Browse to your Appspace Portal page.
2.
Take note of the hostname listed in the browser as this will be used as the Platform Service URL in
Section 2 – Connect Embrava DMS to Appspace.
a. In the example below the Platform Service URL is app4.cloud.appspace.com

Create API Token
For the Embrava DMS to connect to your Appspace instance, the Embrava DMS requires an API Token to securely access the Appspace API to synchronize bookings between Appspace and the Embrava Desk Sign.
Follow the steps below to create an API Token within Appspace:
1.
Log in to your Appspace Portal.
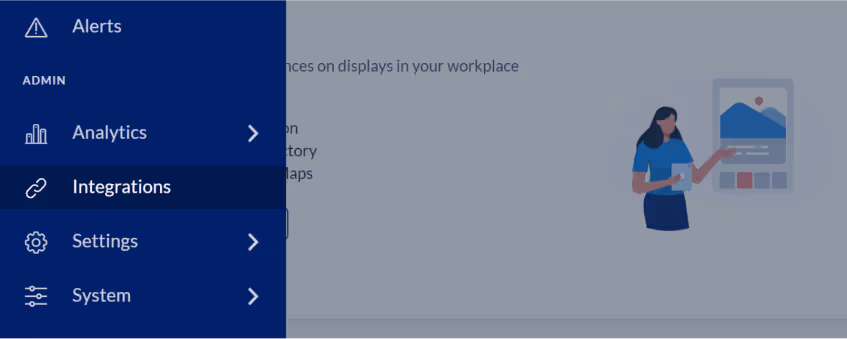
2.
Select Integrations from the main menu as shown below:
3.
Select the API Tokens tab and click Add.
4.
Enter a Client/Application name and select a User with an admin role as shown below:
.avif)
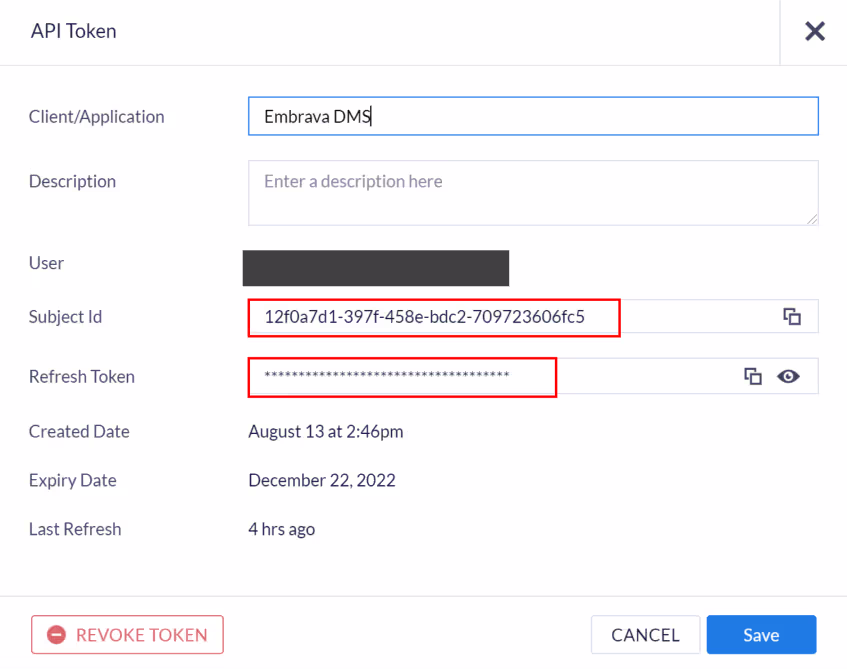
5.
Once the API Token has been created, take note of the Subject ID and Refresh Token as shown below. This will be used by the Embrava DMS to authenticate with your Appspace instance.
This completes the Appspace preparation steps. You are now ready to connect your Embrava DMS to your Appspace instance.


.avif)
.avif)
.avif)