.svg)


.svg)
.svg)
1. Prepare Office 365
The purpose of this section is to detail the steps required to prepare Office365 to allow the Embrava DMS to connect and display Room availability on the Embrava Desk Sign.
Two steps are required to prepare Office 365 for a connection with the Embrava DMS:
1.
Register an Azure AD application: Which the Embrava DMS will use to create and read reservations from your Exchange Rooms and display these reservations on the Desk Sign.
2.
Configure Room Properties: Change default settings on the Exchange Rooms to ensure booking information is displayed on the Desk Sign correctly.
These steps are detailed further below:
Register an Azure AD application
For the Desk Sign to manage the availability of a Room in Office 365 (Exchange Online), we must first register an Azure AD application that the Embrava DMS will use to read and create bookings for an Exchange Room.
To register an Azure AD application please follow the steps below:
1.
Log in to https://portal.azure.com with an administrator account.
2.
Select Azure Active Directory.
3.
Select App registrations.
4.
Select New Registration.
5.
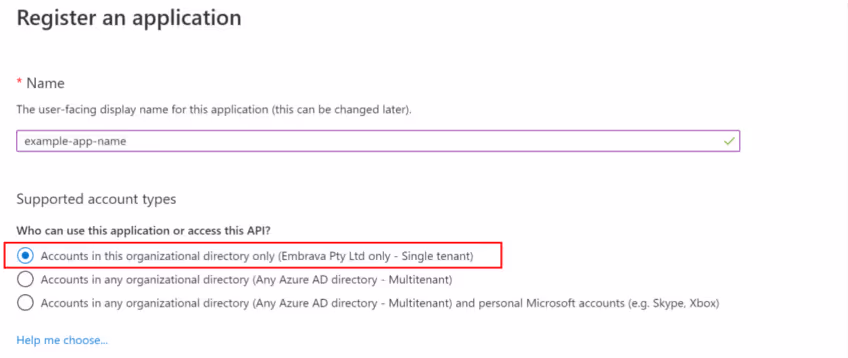
Name the application, allow Accounts in your organization to access the application and click Register as shown below. The Redirect URI can be left blank.
6.
Once registered, the application IDs will be displayed as shown below. Please take note of these IDs as they will be used in Section 2 – Connecting Embrava DMS to Office 365

7.
Create a client secret to use the app by selecting Certificates & secrets and clicking New client secret. Enter a description, expiry and click Create. Take note of the value as it will be used in Section 2 – Connecting Embrava DMS to Office 365.

8.
The application requires the following permissions to access the Calendar of a Room in Exchange Online and lookup AD users from badge numbers/employee IDs stored as attributes in Azure AD:
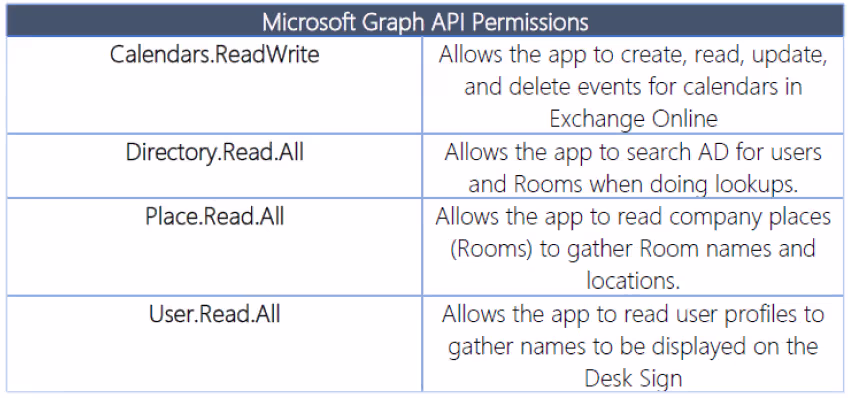
To give these permissions to the application, select API permissions within the application and click Add a permission. Select Microsoft Graph as the API, Application Permissions for the permission type, select all permissions mentioned above and then click Add permissions.
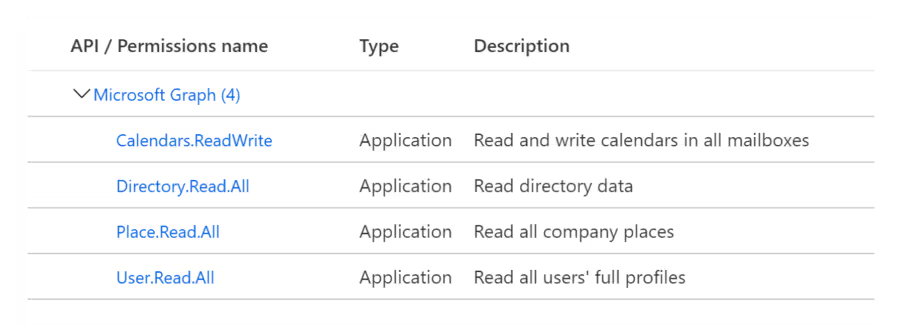
The resulting permissions should look as follows:
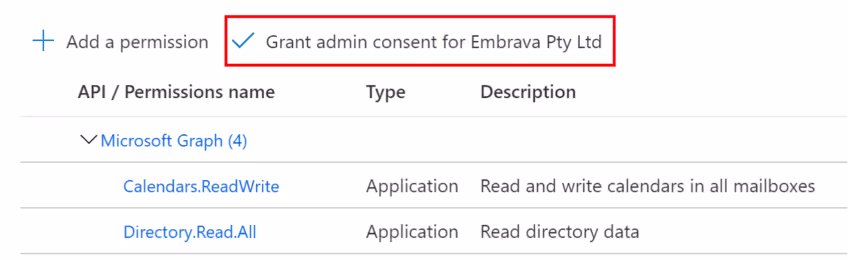
9.
Once all the above permissions are added, grant admin consent for the requested permissions by clicking the button highlighted below:
10.
The Azure AD app the Embrava DMS will use to connect to your Office 365 calendar to read and create reservations is now ready.
For more information on registering Azure AD applications please visit:
https://docs.microsoft.com/en-us/azure/active-directory/develop/howto-create-service-principal-portal
You are now ready to configure your Room properties to ensure reservations are displayed correctly on the Desk Sign.

.avif)


.avif)

.avif)


.avif)
