4. Stage Devices
Once your Desk Sign mappings have been imported into your Workspace Booking Platform, it’s now time to stage your Desk Signs for deployment.
The following table lists the steps to effectively stage your Desk Signs to ensure they are functioning correctly, mapped to the correct workspace, and correctly labelled for ease of distribution across your office(s):
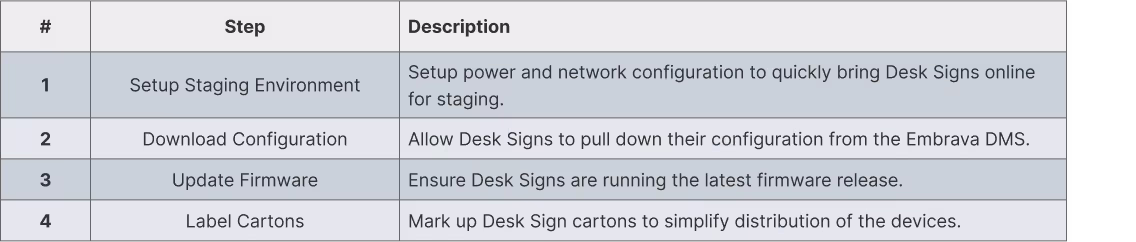
The following sections of this document provide further details on the above steps when staging your Desk Signs.
Setup Staging Environment
A staging environment is necessary to efficiently bring your Desk Signs online to confirm they are functioning correctly and mapped to the correct workspace. The following table lists the key components of a staging environment to help you stage Desk Signs quickly and efficiently.
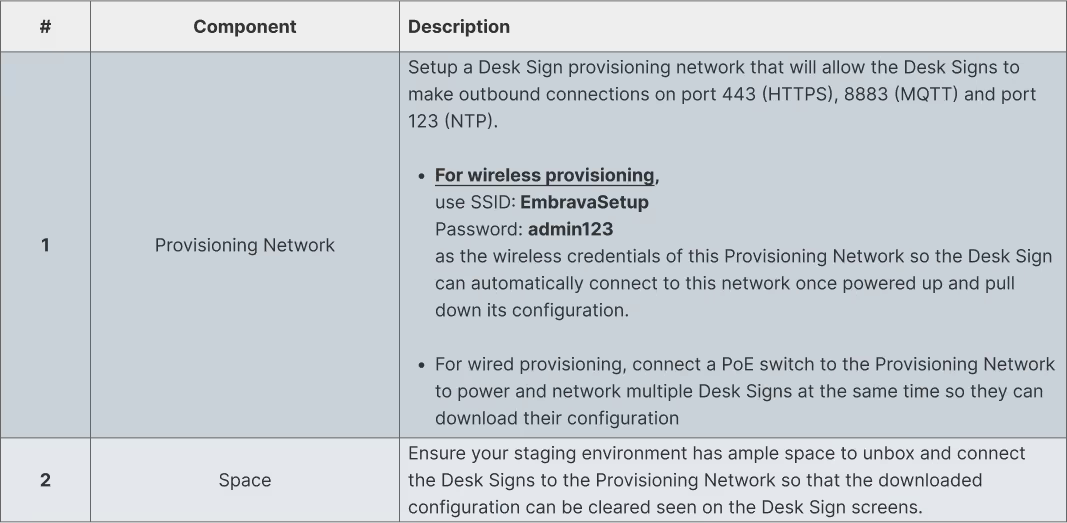
The following sections of this document provide further details on the above steps when staging your Desk Signs.
Download Configuration
Now that your staging environment is ready, our first step is to ensure the Desk Signs are functioning correctly and can download its correct configuration.

Connect your Desk Sign to the Provisioning Network so that they all power up and begin their boot up sequence. You will notice several messages being displayed on screen as the device moves through its boot up sequence.

Once the device completes its boot up sequence, the Desk Sign will attempt to pull down its configuration. If successful, the Configuration Successful screen will be displayed as illustrated on the left.

Once the Desk Sign successfully receives its configuration, it will automatically reboot and display the availability of its assigned workspace. Be sure to confirm the workspace name displayed on each device matches the workspace name as per your Desk Sign mapping.
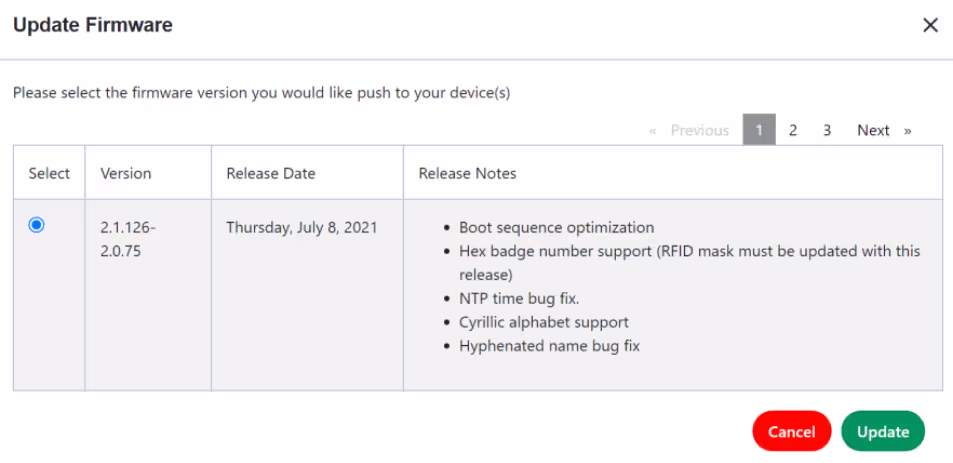
Update Firmware
Now that your Desk Signs have pulled down its correct configuration, it’s time to ensure your Desk Signs are running the latest firmware.
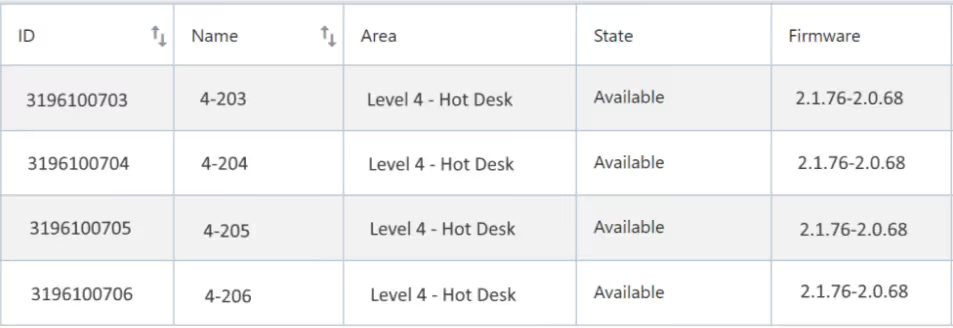
Within the Devices section of your Embrava DMS Portal, you will see a list of your devices that just received its configuration marked as Available with their current firmware displayed.
Select these devices by checking their associated checkbox and then select Update Firmware from the Actions dropdown. Use the Device filters and sorting columns to find the Desk Signs you wish to update.
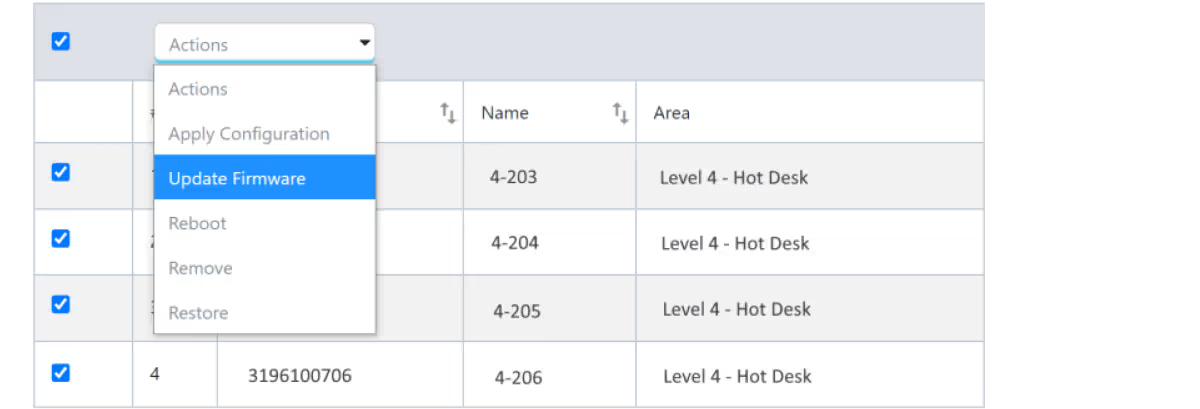
Select the latest firmware version listed from the Update Firmware dialog and click Update. This will notify your selected Desk Signs to begin pulling down and applying the firmware version you selected.
Once the Desk Signs receive the firmware update event, the Desk Signs will display a screen illustrating the download progress of the firmware. Once the files have downloaded, the Desk Signs will begin to flash a blue light for 30-40 seconds as the firmware is being applied.
Once the firmware has been applied, the Desk Signs will boot up again and you will now see your selected firmware version assigned to the Desk Signs within the Devices section of your Embrava DMS Portal.
Label Cartons
Now that your Desk Signs have been configured and have had their firmware updated, it’s time to prepare the Desk Signs to be distributed across your office(s).
Re-pack your configured Desk Signs into their appropriate cartons. Markup your Desk Sign cartons with the floor and workspace details associated with the Desk Sign to assist your team in delivering the correct Desk Sign to the correct workspace.
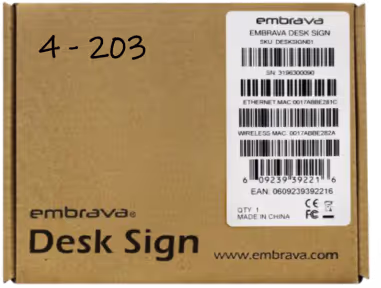
Re-pack the Desk Sign cartons into their appropriate master cartons. Markup these master cartons with the building and floor details associated with the Desk Signs that make up the master carton so the devices arrive to the correct location.


.svg)


.svg)